This is default featured slide 1 title

Go to Blogger edit html and find these sentences.Now replace these sentences with your own descriptions.

This is default featured slide 2 title

Go to Blogger edit html and find these sentences.Now replace these sentences with your own descriptions.

This is default featured slide 3 title

Go to Blogger edit html and find these sentences.Now replace these sentences with your own descriptions.

This is default featured slide 4 title

Go to Blogger edit html and find these sentences.Now replace these sentences with your own descriptions.

This is default featured slide 5 title

Go to Blogger edit html and find these sentences.Now replace these sentences with your own descriptions.

Showing posts with label Offline Digital Image Editor. Show all posts

Creating Vector Image Using Corel Draw

Vector picture is a picture which made from line and curve. Assembly from line and curve would make some an object. It's like a cartoon image. To create Vector Image not very hard. But you must diligent and hard working to make various image.

Vector Image can be made from your digital image. It's very simple as long as you know the steps. Vector Image from digital image have their own fans. It made your digital image or photo looks like a cartoon and you can put it in social network.

We'll try to explain how to make vector image from digital image using Corel Draw.

1. At the first you must know how to make Posterize effect using Corel Photo Paint. Why must be like that? Posterize effect help us to determine the line and border from one color to another. If you don't know to create Posterize please click here. Usually, we use 10 level in Posterize just like in the tutorial.
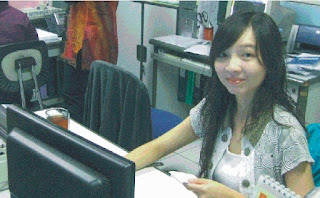
Posterize using Corel Photo Paint
 2. Open your Corel Draw. And then Open your digital image which already Posterize. Remember, in Corel Draw you can't open a JPEG image. So, at first you must create a new page. And then you must import your digital image.
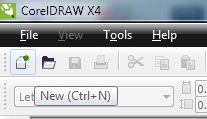
New

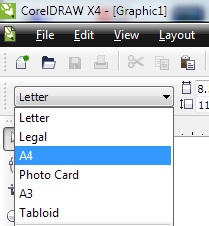
Choose Paper
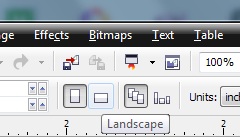
Choose Portrait or Landscape
Import your digital Image
3. Choose Pen on the left bar. And make line due the line from line on your Posterize digital image. All line on Posterize image must be lined using Pen. After that you can colored it with left click to choose color in the right bar Corel Draw
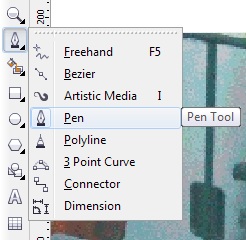
Pen
 
Make lines using Pen
4. You can create colored, black and white or another color to your vector digital image. And then you can save it.
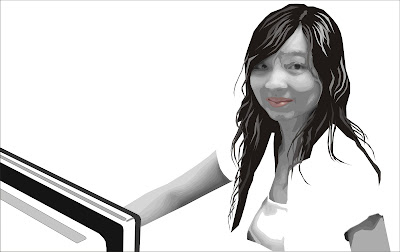
vector image in black and white
vector image in blue

Create Posterize Using Corel Photo Paint

Posterize effect actually a tool use for support to create another effect or another picture in digital image editing. For example, posterize used for creating vector picture from a digital image. Posterize make your digital image show the line between colors. So it make easily to create vector picture.

To create Posterize effect is very simple
1. Open your digital image or file
2. Left click Image and chose Transform and then left click Posterize
Image > Transform > Posterize
3. New window will open
Posterize
4. Now you can save tour digital image
before Posterize

after Posterize

Create Black and White Picture/Photo/Digital Image Using Corel Photo Paint

Black and White photo or digital image have their own fans. It's really nice to have black and white photo or digital image. It's really interesting. It have different soul from colored digital image. And we already knew that at first time digital image or photo made in black and white.

To create black and white digital image using Corel Photo Paint is very simple. And after that you can adjust the tone or another tools.
1. Open your file.
2. Left click image and choose Convert to Grayscale(8-bit)
Convert to Grayscale (8-bit)
3. Now you can save it to your computer or adjust using another tools.
before Grayscale
after Grayscale

How To Crop Photo or Digital Image Using Corel Photo Paint

Cropping is erase some element/part of your photo/digital image but your digital image still in square. Cropping can use for reduce size of digital image. Cropping in Corel Photo Paint very easy to use.
1. Open an image or photo or digital image you want to crop like this tutorial
2. Left click crop tool at the left
Crop Tool
3. Crop which part you want to save. Your picture will be like this.
Cropping
4. After that double click at the image you want to save.
Before Cropping
After Cropping

5. Then you can save the digital image like this tutorial.

How To Saving Photo Using Corel Photo Paint

As we talk about Corel at this page, now we're ready to create or enhanced digital image or photo. Form the beginning you must know how to open a photo or digital image. You can learn at this page. After open a photo you can enhanced or edit it. But before an editing photo, we must know how to saving it to our computer.

Let's we start learn how to saving a photo or digital image using Corel Photo Paint.
1. Open a photo or digital image use this tutorial
2. After that if you want to save, left click File at top left corner and choose Save As
Save As
3. New window will appear "Save an Image to Disk". And choose where the file want to save. Don't forget to choose what type file you want to save at Save as type. In this picture we choose JPG - JPEG Bitmaps.
Save an Image to Disk
4. A new window JPEG Export will appear. You can choose Progressive or Optimize. At this window you can setting the Compression and Smoothing.
JPEG Export
5. And then click OK. Now, you have a new pictur or photo or digital image on your computer.

How To Open Photo Using Corel Photo Paint

We already announced, that Corel have a digital image or photo editor. It's Corel Photo Paint. You can check in here.

To get Corel Photo Paint you can download it at www.corel.com. Please buy the software. Don't use an illegal progam. It's better. We are currently use Corel Photo Paint X4. If you already have another series, it's not quite different.

After doing the installation on your computer, you can open it. We will learn from the top menu or the File menu bar. Now, we try to open digital image or photo.
1. Open your Corel Photo Paint
2. Left click Open

Open an image from disk (Ctrl+O)
 3. After that, a new window will open
Open an Image

Now, you can choose photo or digital image you want to edit

Corel Draw and Corel Photo Paint

In this century, people can't separated from digital image or in other words photo. Even, handphone with camera can take picture and then upload it to social network easily. But camera in handphone no as good as camera DSLR. So, people can use digital image editor to enhanced it. And don't forget, digital image editor more involved to be better, from now on. Because they knew, everyone interesting in digital image or photo to capture their moment.


If you used Core, there are two product in Corel that usually used to enhanced  digital image. Corel Draw and Corel Photo Paint. Although Corel Draw can enhanced our digital image, but it better if using for design.
Different from Corel Draw, Corel Photo Paint more used for enhanced our digital image. We can say digital image editor or photo editor. Just like the other offline digital image editor, Corel offering some of tools to enhanced our digital image to be more attrative.

If you already have Corel Draw and Corel Photo Paint, you can compare it. Wich one better to enhanced digital image. I believe Corel Photo Paint. Some time you can combine Corel Draw and Corel Photo Paint. You can put some ornamen to your digital image using Corel Draw. Or you can creat vektor digital image using Corel Draw so easily. It's some excess from Corel Draw.

Different from Corel Draw, Corel Photo Paint very easy for ehanced our digital image. For example, make black and white, add saturation, color enhanced and others. Because every tools in Corel Photo Paint designed for digital image editor. Corel Photo Paint very easy to used to. You can learn it step by step or just try left klik the tools.

GIMP Freeware Digital Image Editor

Lots of photo editor software in the world of digital image editing. Lots of software appear to occupy the hearts of digital image editing lovers. Most digital image editor used by the designer and photgrapher. But it is possible for ordinary people who want to their photos more attractive. Not a few software offers a range of advantages.

Do you ever heard GIMP? GIMP or GNU Image Manipulation Program is one of the famous software in digital image editing. GIMP ability is able side by side with Photoshop CS 5. Moreover, this software is free. Even you can provide input on the developer if you feel something is missing.

GIMP on the web it also provides the user tutorials, ranging from beginner to expert. From photo editing to Script Authoring. This all will pamper you as a lover of digital image editing. Not only that, GIMP is also available for Mac OS X users.

You can download GIMP at http://www.gimp.org/downloads/. Enjoy it. And you can tell what a nice to have digital image editing GIMP.

Reduce Noise With Noiseware

Do you like Photography? Do you like digital image editing? DO you have camera Digital SLR? Are a new comer in photography? Your camera only medium format?
Now, it's not really matter any more if our photos not good as professional photographer. We can edit our image with offline photo editor. So the result can better if compare when without image editor software.

In the world photography there are many sub menu. Among wedding photography, macro, abstract and the others. What's your choice? If you choose macro photography, need a clean photo. Our photos must be really clear and clean. But with blur background. Do you agree with me? Or it's must be noise or grain?

In macro photography, noise really annoying, right? It can happen because in macro photography, we magnification object until 2:1 or more. Sometime if our lens and camera doesn't good enough it can be noising. How we can erase it?

Have you heard noiseware? Right Noiseware. It can erase noise from our photo. And it's a freeware. You can download at http://en.kioskea.net/download/download-439-noiseware-community-edition. How it's work? It's easy to use?
Yes. It's really easy to use. You only open your photo and then process it. And then... bang... your photo clean from noise. 
But remember. If you using noiseware, your photo size will reduce.
before using noiseware
after using noiseware

Picasa 3.8 Freeware Editing Photo

Picasa 3 read all your photo and image
Everyone want to look more attractive in their photo, right?
At this time so many software for photo editing or image. Not a few software that offer freeware. Some are offered online or via a web photo editing. Any photo editing software has advantages and disadvantages. Of the many tools for editing photos should really find for the best and suitable in accordance with the wishes of our needs. For a photographer maybe they need Photoshop. While for some people just need Picasa or Photoscape. Or for some people who don't need software requires only an online photo editing through the web that provide them.

Picasa, right, Picasa 3.8 offers true photo editing freeware sufficient for someone who likes to enhance the look of your photo. This freeware is only 13.6 MB. You can download it at http://picasa.google.com/. For some people might be a little confused when at first to use it. Because after installed, Picasa 3.8 will read all the image/photo in computer and display the photo folder on the right. But this actually will help us. We'll no longer need to find photo at the folder where we put our photo.
Picasa 3.8 presents a tool to upload photo. So you can directly upload your photo. This is the one of the advantages Picasa 3.8 when compared with other freeware. In addition, you can immediately provide names of your friends on your photo. Because Picasa 3.8 can detect faces like on facebook. This is very exciting.

To editing a photo or image, Picasa 3.8 offers a wide selection. Among Basic fixe, tunning and Effect. Picasa 3.8 also displays histograms and Camera Informations from image or photo. This is very useful if you can read Histogram of course.

Each freeware has a weakness, right? Maybe for some people Picasa 3.8 is less attractive because of the lack of tools provided to editing photo. But Picasa 3.8 also provided a tool to directly editing photo at "picnic". In addition, you can instantly publish photos to your web or blog. Now it's up to you to choose freeware that fits with your needs. Next time We Will give Some tutorials using Picasa 3.8

Photoscape a Simple Photo/Image Editor

editing photo using photoscape
Are you bored with the offline edit photo photo editor? Or software that you install on your computer? I hope not. You can also provide lessons for your child to learn. Or you can share to your friends how to use it. Or you can show off your image after editing to your colleagues in social networking.

Are you bored with your software? Have you ever tried Photoscape? Now We'll try to Introduce a about Photoscape. It's a simple photo editor offline. You can download at www.photoscape.org. It's only 16MB. You can't imagine what the inside Photoscape Until you try it.

Photoscape is very easy to use when compared with some other software. Altough Photoscape isn't much better with other software. But if you want simple software, so Phoscape is the answer.

It's easy to use for editing photo or image. In the Photoscape given you editing that you want. For example like boder, additional images, add words like in the comics, making grayscale, crop, or resize. Of course in the adding words (speech ballon) there are many font that you can choose.

Not only that, if you are using Photoscape you can adjust levels, contrast, or sharpen. Because when you wear a pocket camera, sometimes your photos result does not comply with your wishes. For example, too dark or too bright. This could be due to the camera that we use or our ability to understanding about photography.

Photoscape also adding filters. Of course, with a variety of options that will make you amazed. Among noise, crystallize, edge, jitter and many more. Photoscape has own place buttons in a position that is easy to recognize. So for a beginner would be very easy to understand.

Are you interested? You'd better hurry download it at www.photoscape.org. And enjoy it.

Fastest Way To Improve Photos

learning by reading

As we know, at this time many people want to look attractive on social networking. They will show them a good photo so that makes other people will be interested. Not a few websites that offer a place to share files / photos. So that others can see the attractions around the world. Of course, with good photo quality.

On development of photos editing needed speed and interesting results. Moreover, coupled with business competition in a business such as wedding photography. It's very necessary ability photography and editing image quality for the results satisfy the customers.

To get the speed and interesting results can be used in photo editing photoshop. Not a few people who use photoshop to enhance their photos. Also even if you do not use photoshop they will never be satisfied. This is also due to lack or limitation of the camera used.

Photoshop offer a very quick step by using the feature "action". Only with once clicks you can generate a very interesting photo. This way save your time. This method is very effective and efficient. In fact you're no longer need to learn how to use Photoshop. All you do is need to find for "action" in this case download the "action". Many websites that offer "action" either pay or free. Among deviantArt.

For example download this action : http://nooreva.deviantart.com/art/Infra-Red-action-by-noor-96073591 by Muchamad Noor Eva A. This action will displays your photos are like Infra Red photo. This will make your photo more interesting.

How to incorporate action into Photoshop:
Double click the action that you've downlod. Then it will automatically opens Photoshop and will enter into the history of action.
If your file more than 1, you can do with this ways:
1. Open Photoshop
2. Click Action on the right of the picture are like Play button
Action tool

3. Select Load Actions.
choose Load Action...

4. New window will appear(Load). And then you can choose multiple files action (ATN file) simultaneously. Then click Load. Your "Action" will be logged into the "Action" history.
new window " Load "
Or you can creat your own action. You can learn at here 
 http://blog.epicedits.com/2008/03/07/how-to-create-photoshop-actions/